HOWTO: Install Cytoflow
Windows
On Windows, you can use a graphical to install Cytoflow.
Browse to https://cytoflow.github.io/
Download the Windows binaries by clicking the button at the top of the page.

Even though I’ve signed the Windows app, Windows doesn’t recognize me as a “certified” developer. (It’s EXPENSIVE – even more so than becoming an Apple developer.) So you’ll get a
Windows protected your PCmessage: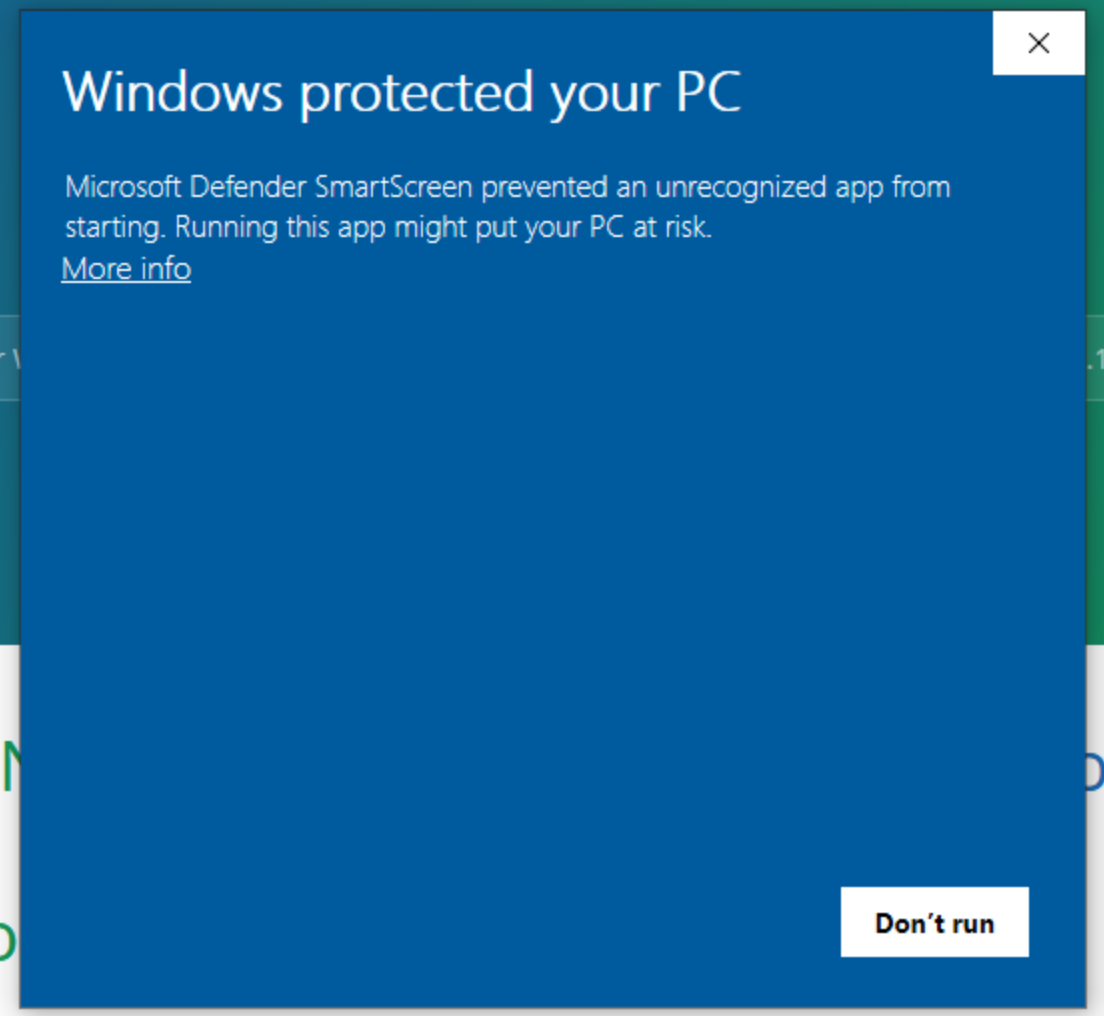
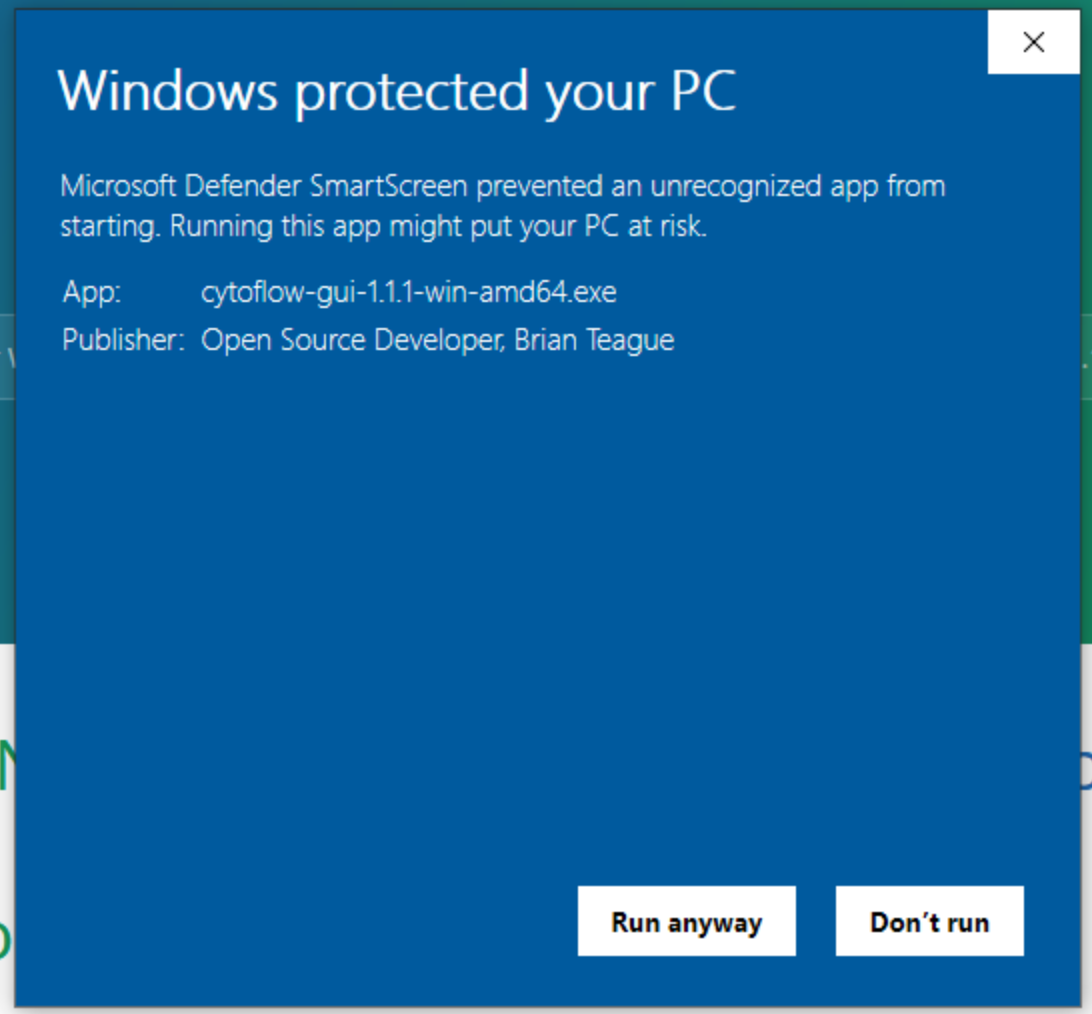
However, if you click “More information”, then you can verify that the installer is signed “Open Source Developer, Brian Teague” (that’s me!) and then click “Run anyway.”
Follow the instructions in the installer. Once you’ve completed the installation, you should be able to find
Cytoflowin your Start menu.
MacOS
These instructions were developed using OSX Catalina. I don’t own a Mac or use one on a regular basis, so if these instructions could be improved, please let me know. Also, these binaries were almost certainly built on an Intel Mac, so they may not work on an A1 mac.
Browse to https://cytoflow.github.io/
Download the MacOS binaries by clicking the button at the top of the page.

Using Finder, browse to your Downloads folder.
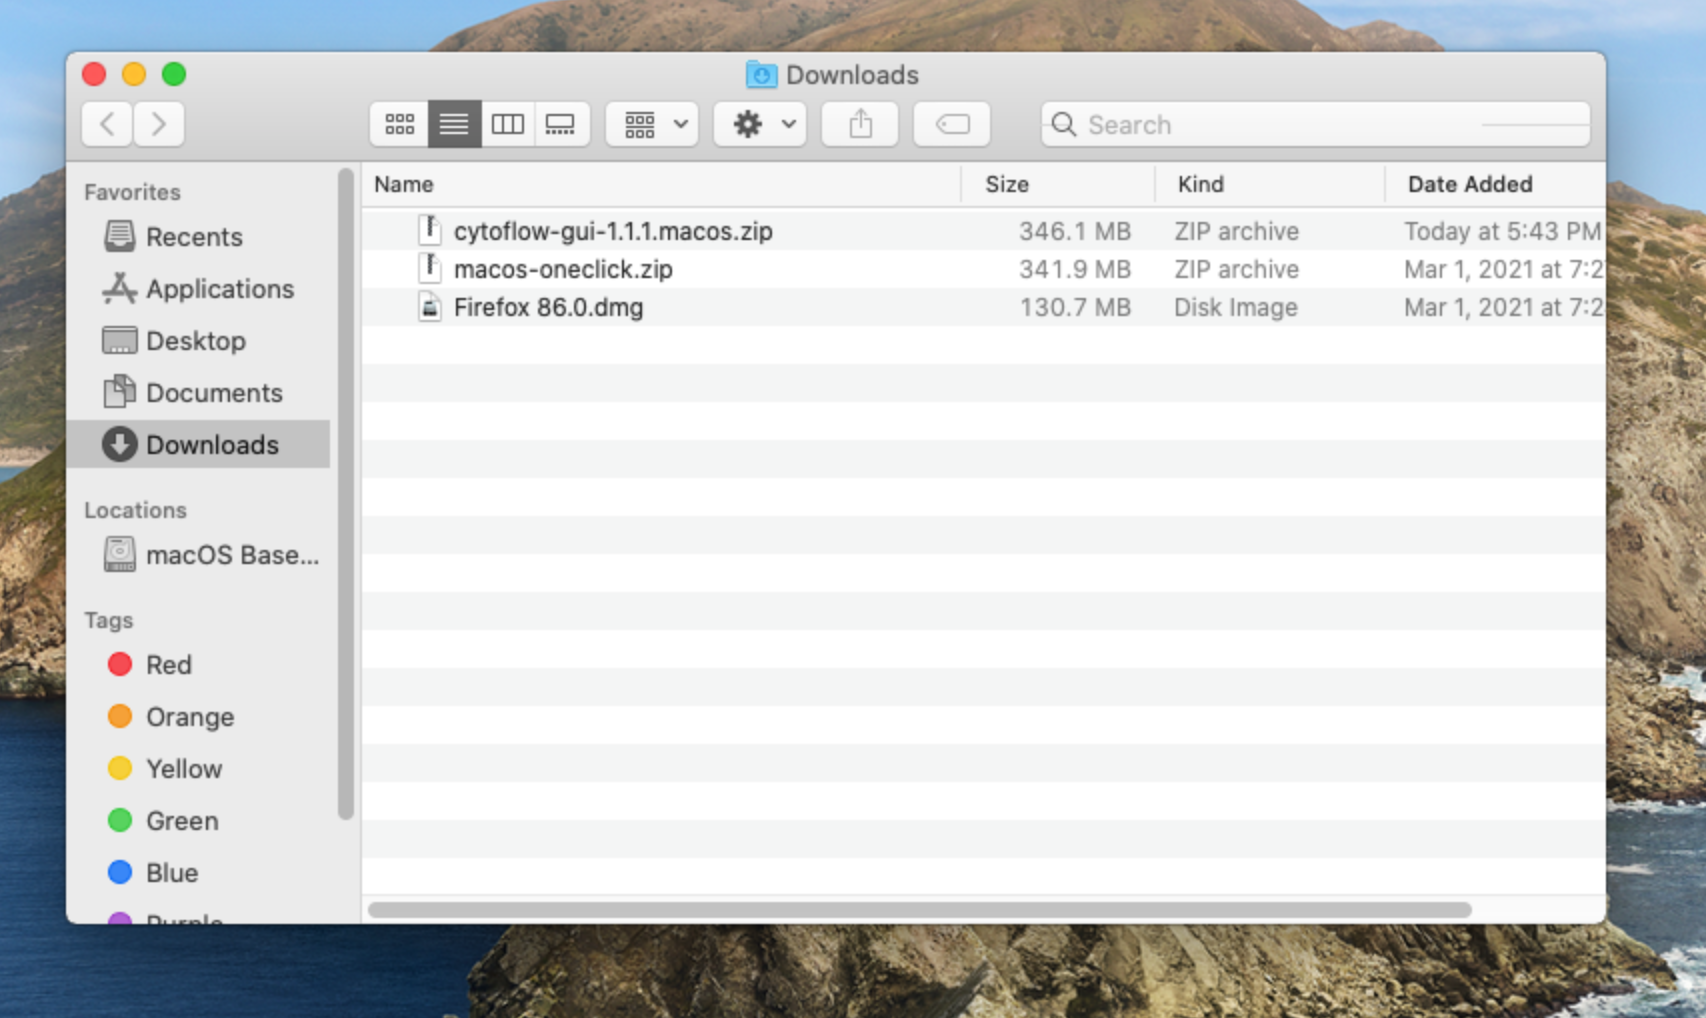
Right-click on the .ZIP file you downloaded and choose “Open With –> Archive Utility.”
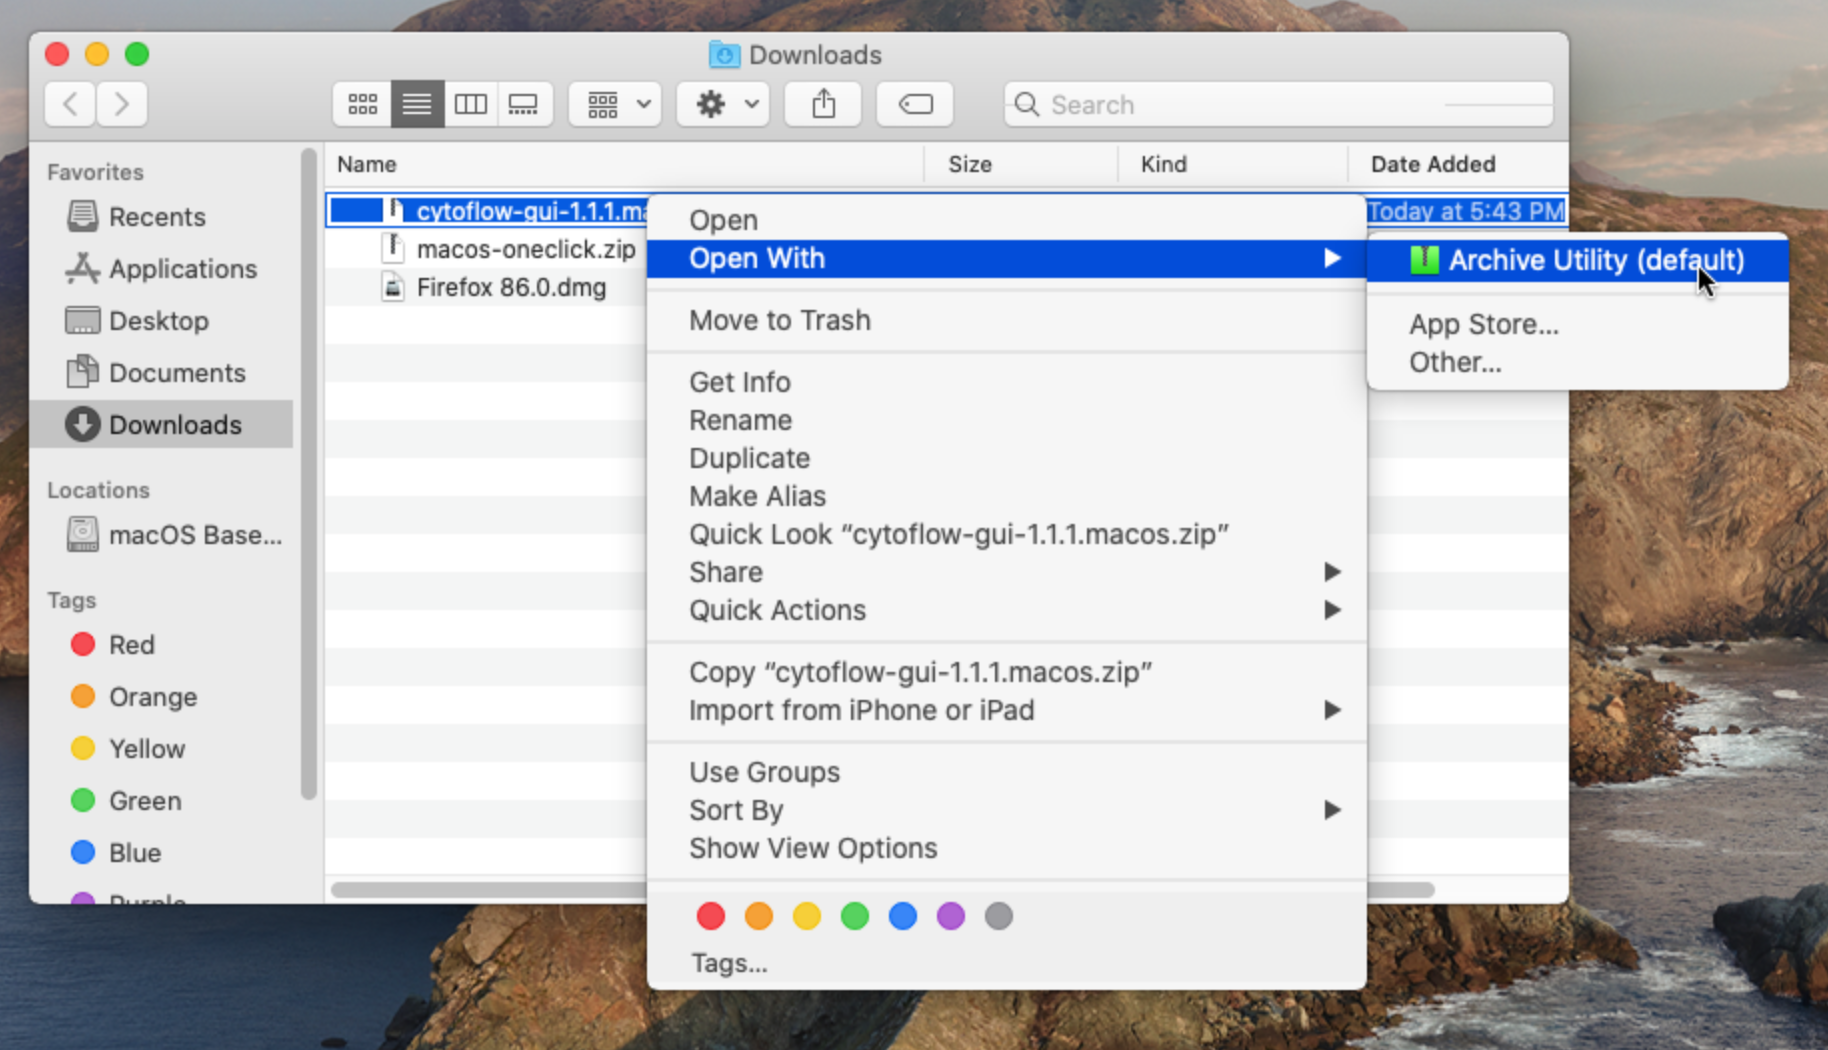
This will extract the application from the archive.
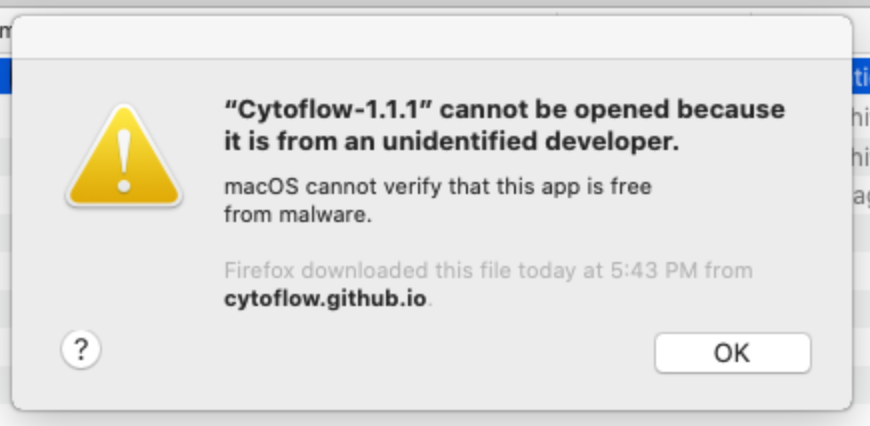
Double-click the new application. Unfortuantely, I am not an Apple Developer, and because it costs like $100 a year, I likely never will be. So, the first time you run the application, you will be presented with a screen like the following:
To launch Cytoflow anyway, open
System Preferencesand select theSecurity and Privacypane: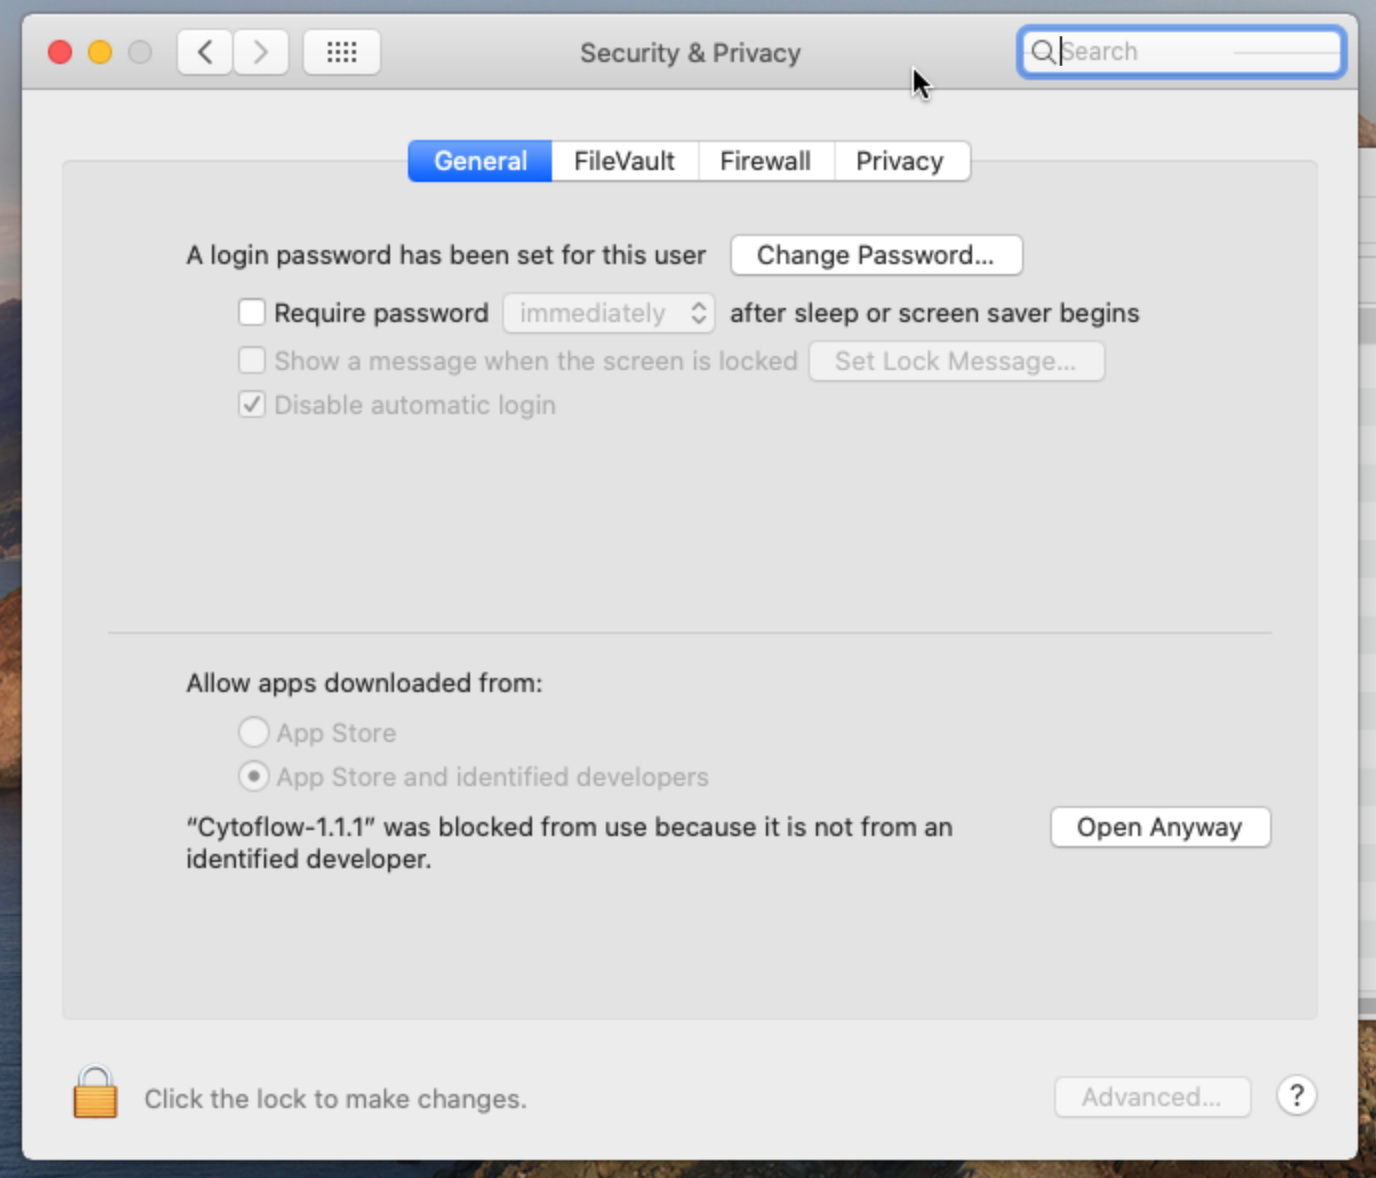
Click the Open Anyway button. Because MacOS wants you to be EXTRA SURE, you will be asked one more time if you’re sure you know what you’re doing:
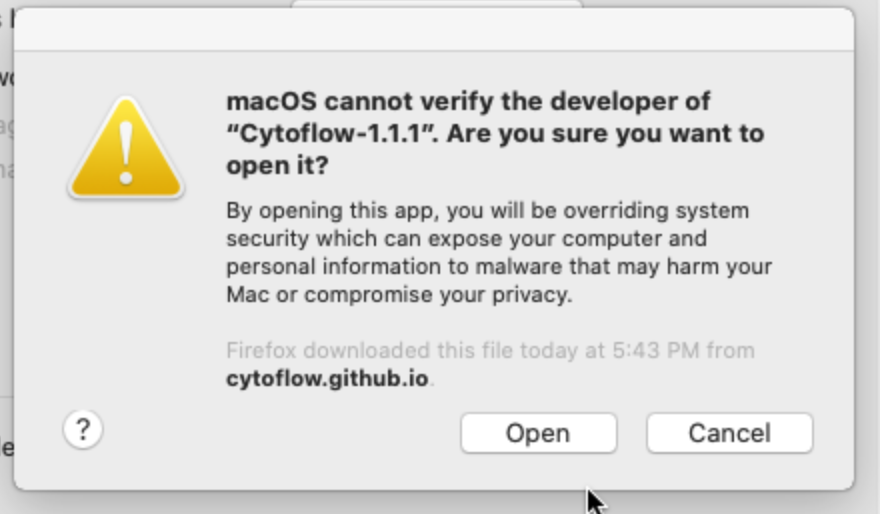
Click Open and after a moment,
Cytoflowshould launch.(Optional) Move the Cytoflow application to somewhere else “permanent”, like the desktop or your Applications folder.
Linux
These instructions were developed on Ubuntu 20.04 – they should work on any modern Linux desktop system. However, they do require some comfort with the command line. If they don’t work for you, or you are desparate for a point-and-click installer, please file a bug (or better, a patch or pull-request.)
This results in a program that you can launch from your desktop launcher – the “Programs” menu or similar.
Browse to https://cytoflow.github.io/
Download the Linux binaries by clicking the button at the top of the page.

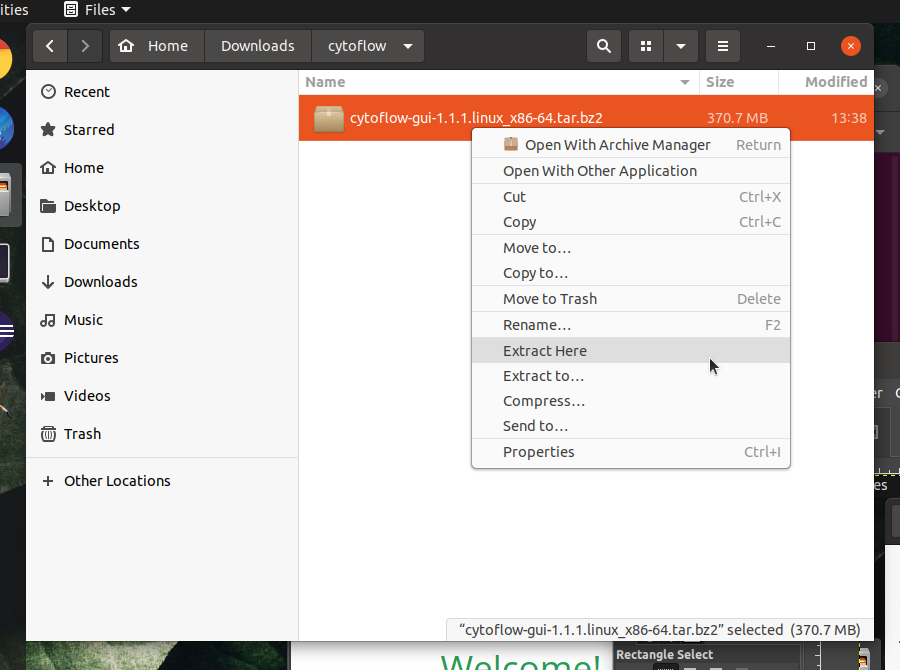
Extract the archive:
Move the resulting directory to a “permanent” home. I like to drop such things in
~/.local/lib, but you may prefer to put it elsewhere.The remaining steps should be completed from the command line, starting in the directory containing the extracted files.
If you would like to launch
Cytoflowfrom the command line, you can do so by navigating to this directory and running the executablecytoflow.Update the location of the icon in the
.desktopfile by calling theset_launcher_iconscript:$ ./set_launcher_icon
Link
cytoflow.desktopinto the~/.local/share/applicationsdirectory:$ ln -s $PWD/cytoflow.desktop $HOME/.local/share/applications/cytoflow.desktop
Update the database of desktop entries:
$ update-desktop-database ~/.local/share/applications