HOWTO: Export FCS files
I’ve tried to make Cytoflow both powerful and straightforward to use, but
I understand that some people may wish to use other software for their
cytometry analysis. Cytoflow has some unique capabilities – in
particular, its Bead Calibration and TASBE modules – and it
is possible to import data into Cytoflow, calibrate or otherwise
manipulate it, then export it back to FCS files that can be opened with
other analysis programs.
Procedure
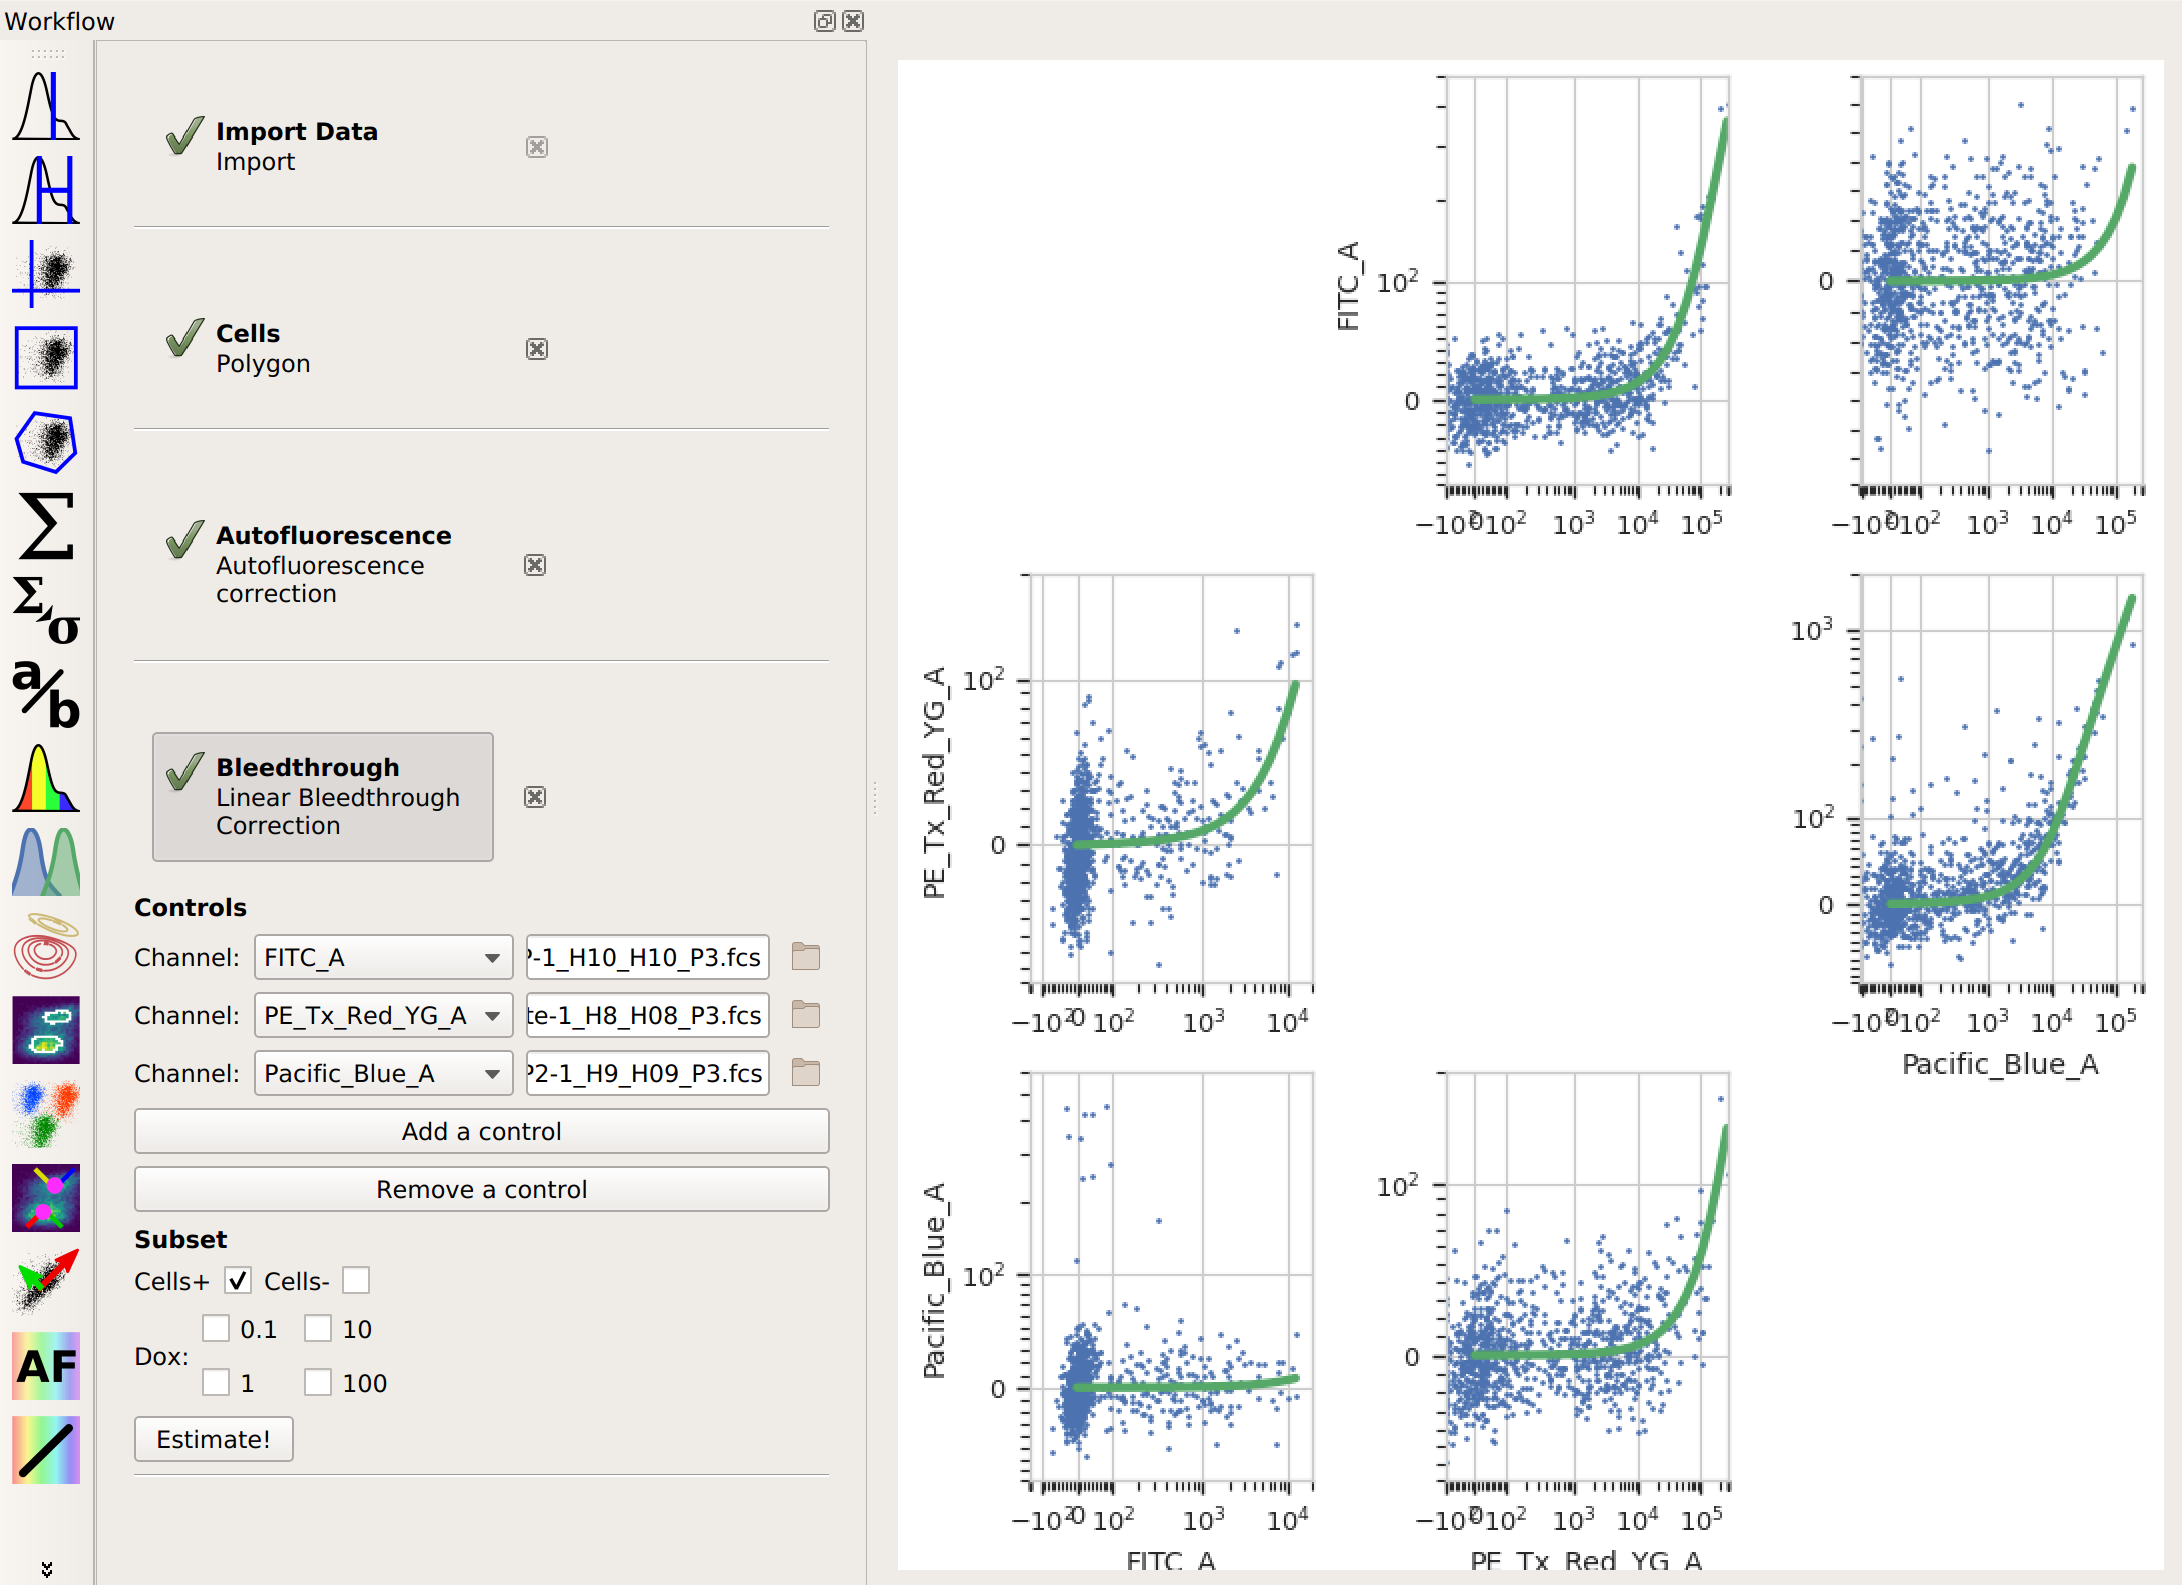
Import your data into
Cytoflow. Do not import your control samples (unless they’re part of the experiment.) In the example below, we’ll have three fluorescence channels – Pacific Blue-A, FITC-A and PE-Tx-Red-YG-A – in addition to the forward and side-scatter channels.
Perform whatever calibration or manipulation you would like. In this case, I’ve applied the Autofluorescence and Bleedthrough modules.
Choose the Export FCS view. It’s the
 button. Note that this is
found on the Views toolbar, not the Operations toolbar.
button. Note that this is
found on the Views toolbar, not the Operations toolbar.Select how you’d like the data split up when it is exported. Remember, when
Cytoflowimports data, it “forgets” everything about the “tubes” that the data came from – it only knows which sets of data were treated with which conditions. Select which conditions should be split into separate FCS files in the view parameters.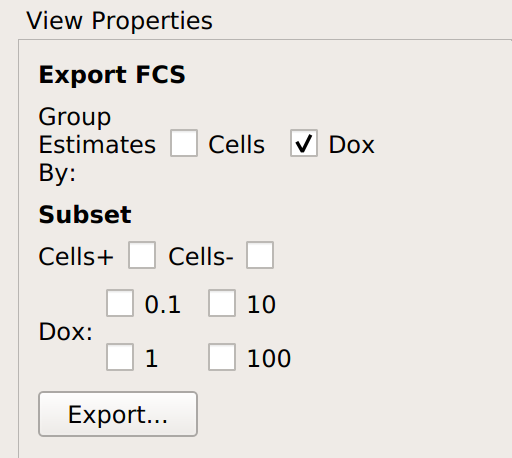
In this case, I’ve asked for each unique value of Dox to go into its own FCS file. The table in the view pane will show you which files will be created.
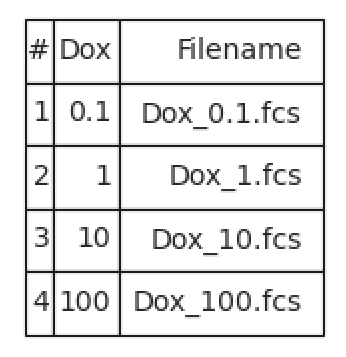
Click Export… and select the directory to save the FCS files to.